
No products in the basket.
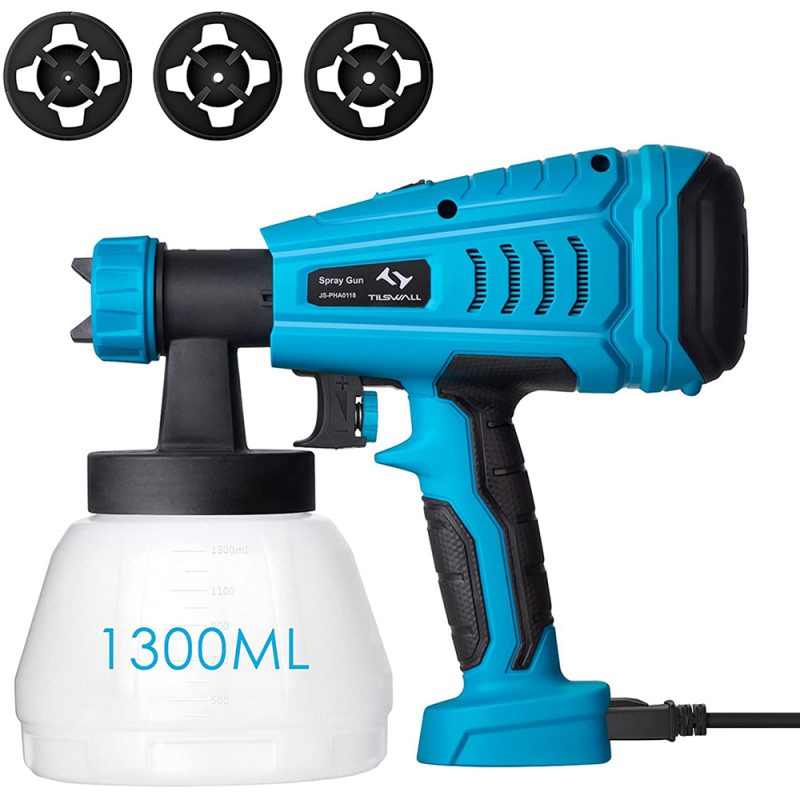
paint sprayer
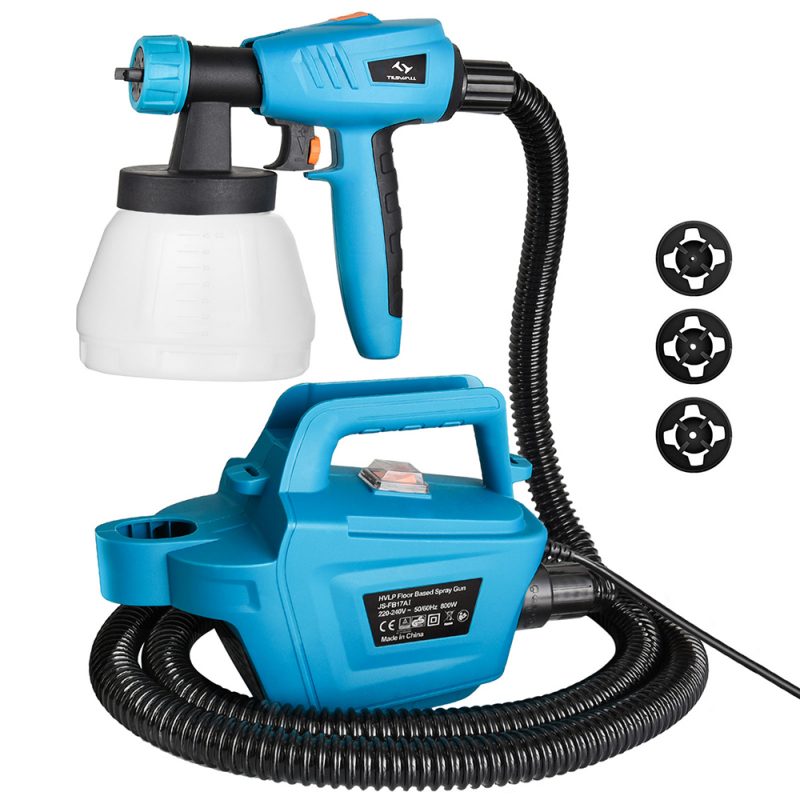
A Test of the Tilswall Electric Paint Spray Gun: Great Coverage & Smooth Effect

14
Jul
Jul
Are you searching for quick and reliable domestic paint techniques and tired of searching online? Don’t give up; keep in touch with unique ideas to make your paint job hassle-free. The best is to initiate DIY techniques and use an incredible tool such as a Tilswall paint spray gun. If you want to know about this product, I can walk you through a perfect Tiswall electric spray gun test. Just keep in touch with this guide to kick off your paint projects.
Right tools play a handy role in accomplishing challenging paint jobs easier. Whether you paint metals, wood, fences, or cars, these tools are essential. Therefore, a Tilswall paint sprayer is a game-changer tool I use at home to accelerate my painting task quickly. My experience was remarkable, and I can’t stop giving it five stars!
How to Install Tilswall Paint Spray Gun Quickly?
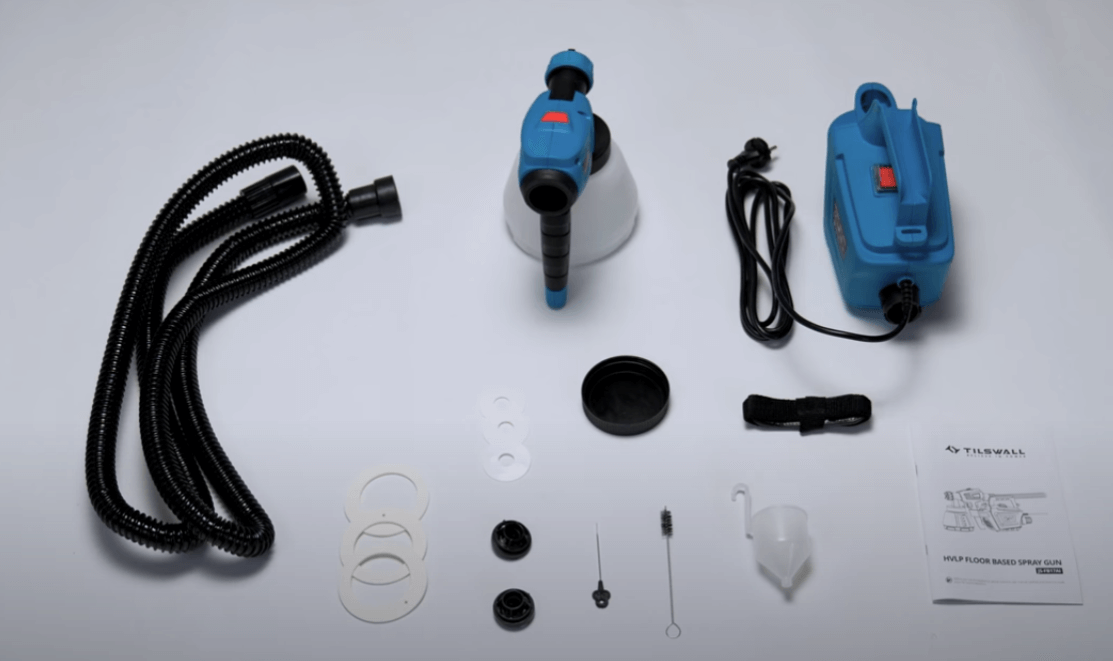
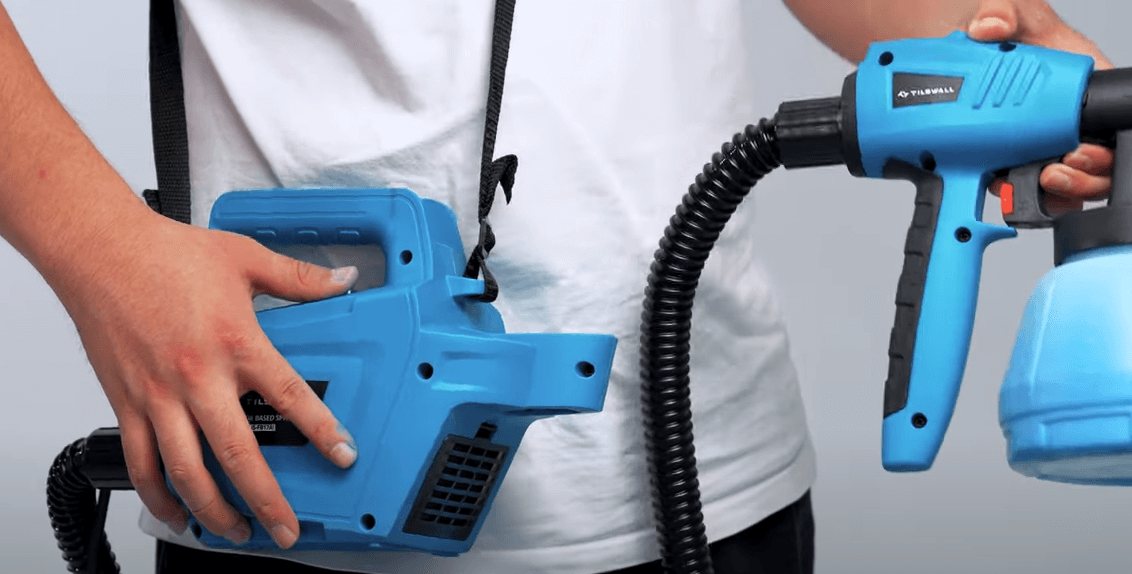
If you aren’t familiar with the Tilswall electric paint spray gun and how to install it for little domestic operations, I can make the installation process easy in three simple steps.
3 Steps to Complete the Installation
Here are three quick steps to complete the installation!
- The first step is to attach both sides of the spray gun to the strap hole for easy carrying
- The second step is to connect the hose to the spray gun mainframe
- The third step is to connect the hose to the spray gun
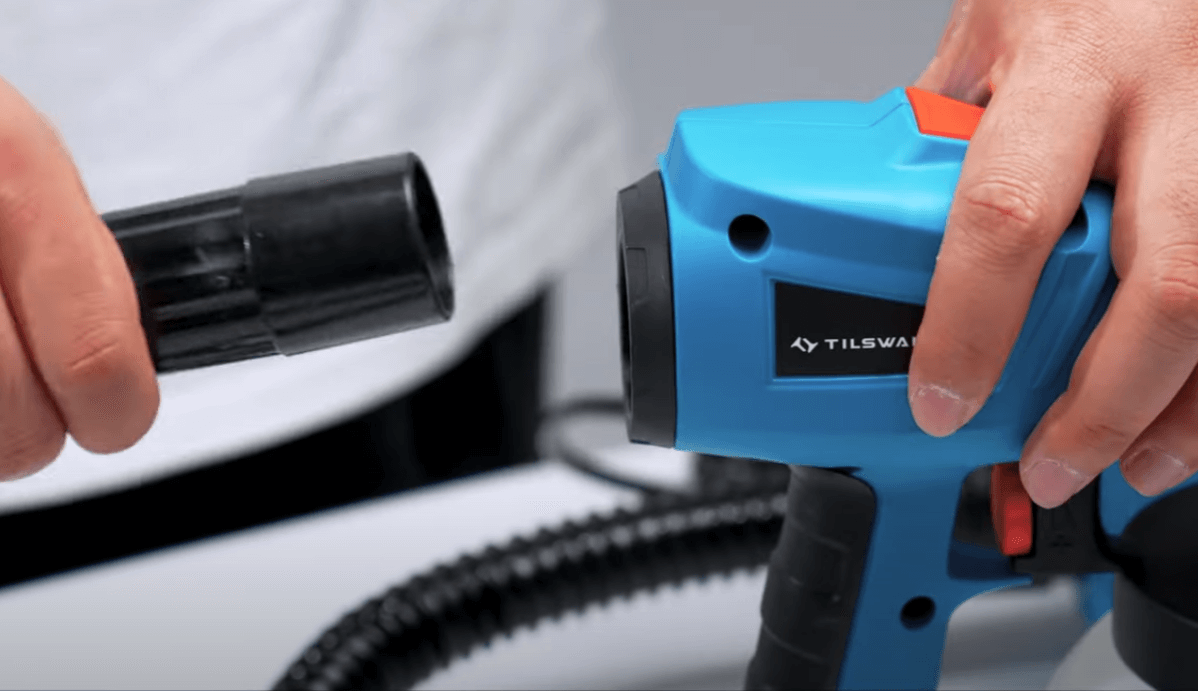
These are the three easy steps to assemble the Tilswall paint sprayer gun before starting the job. You can’t make your paint gun aligned and ready for the task without assembling the spray gun. In this way, you can’t produce quality paint results. Let’s move on to other crucial steps to help dilute the paint!
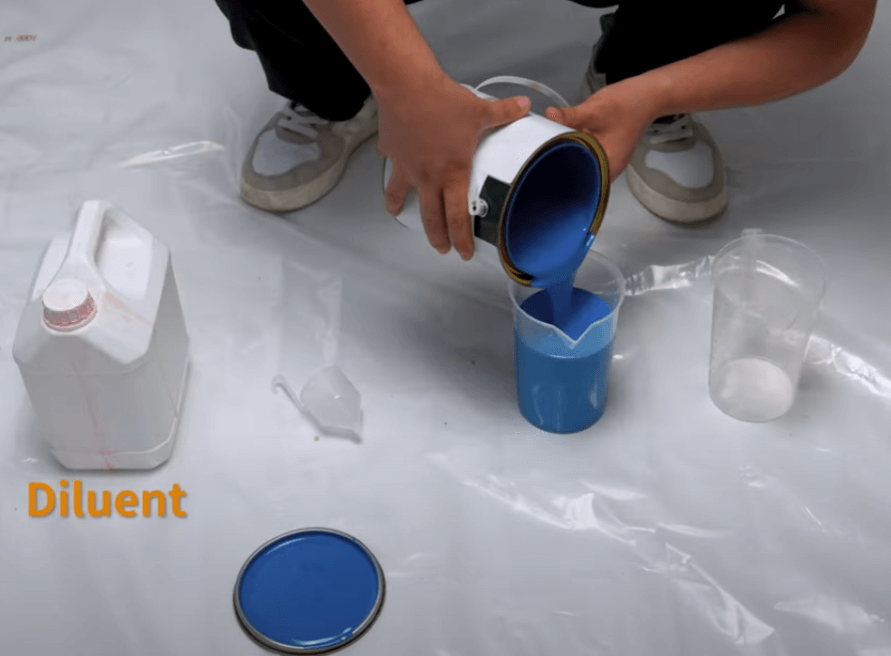
How to Dilute The Paint?
Dilution is the process of adding thinner to the paint to make it smooth for painting. You can’t fill the paint inside the spray gun without dilution, which inspired me when I learned about the painting process. Adding quality thinner to the paint is a must to make a perfect mixture. Further, to dilute the paint, I came across four steps you must follow to carry the best job at home.
Step 1: Search for Paint Types
The first and foremost thing is to search for the paint types that vary from job to job. Paint color selection is another debate, and it’s your choice whether you consider light or dark shades. The real thing is to select the paint type that fits best on the object.
Thankfully, Tilswall 800w paint sprayer makes your selection easy, no matter if you are looking for varnish, oil enamel, oil-based primer, or oil stain. You have to be clear about the paint type before dilution performance takes place. You may also view the dilution chart, but my personal experience was phenomenal when I chose the right paint type.
Step 2: Performing Dilution
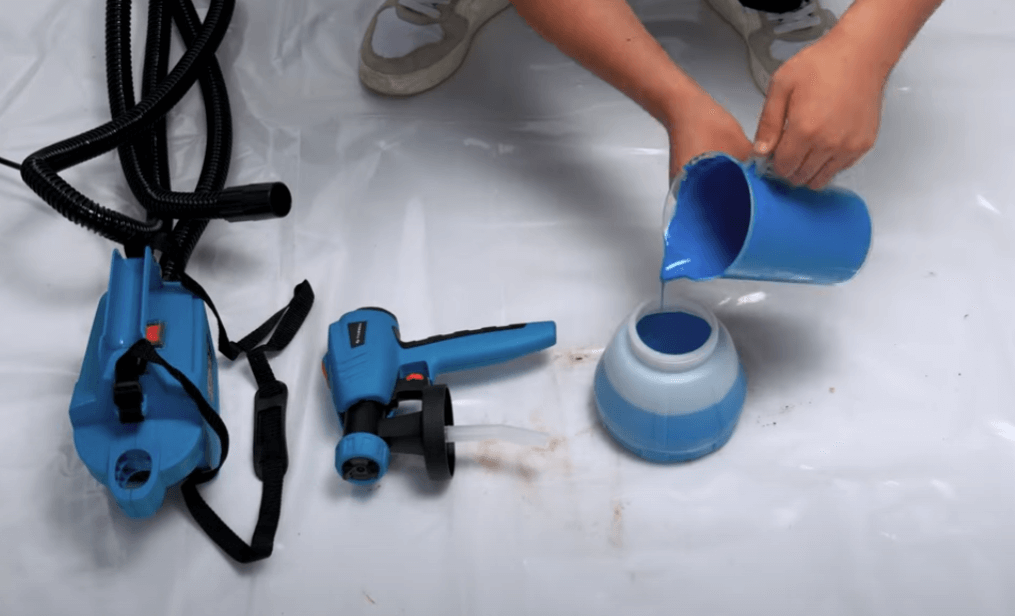
After choosing the right paint type, the next is to perform the dilution. To fill up your 800W paint sprayer, add solvent or thinner to the paint to make it thin and smooth for the wall, wood, or whatever object you choose for coloring. Make sure the mixing goes well to keep the tool away from clogging.
Step 3: Measuring Time
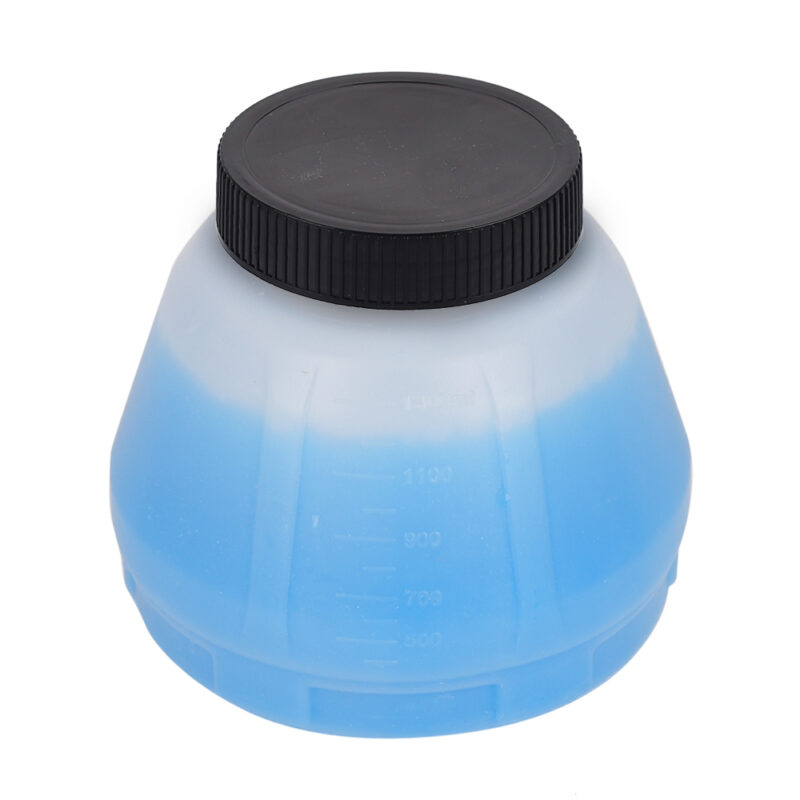
After thoroughly diluting the paint, fill the viscosity cup to the brim with the color. Measure the time it takes for the diluted paint to leak out of the viscosity cup.
Step 4: Dilution Confirmation
If the diluted paint leaking time corresponds to the time written on the paint thinning chart, your paint is ready for use in the Tilswall 800W paint sprayer. If not, dilute it; otherwise, you cannot spray it properly. If you want to perform an excellent paint job, you have to follow these steps just like I followed to get the best job done.
How to Paint?
Painting is never easy; it looks easy but comes with many challenges. A painter must focus on the job, which requires consistent hard work to finish a job. With the help of Tilswall paint spray guns, you can reduce some workload, as it allows you to stand comfortably in a relaxed posture while painting, as you don’t have to stand on the ladder to complete your job.
I always enjoy painting at home using a paint spray gun, and I want to inform you before you pick the spray guns to begin the job. Furthermore, you must follow a few steps to create professional results with the electric spray gun. Here is a step-by-step guide:
Pre-Use Adjustment of the Spray Gun
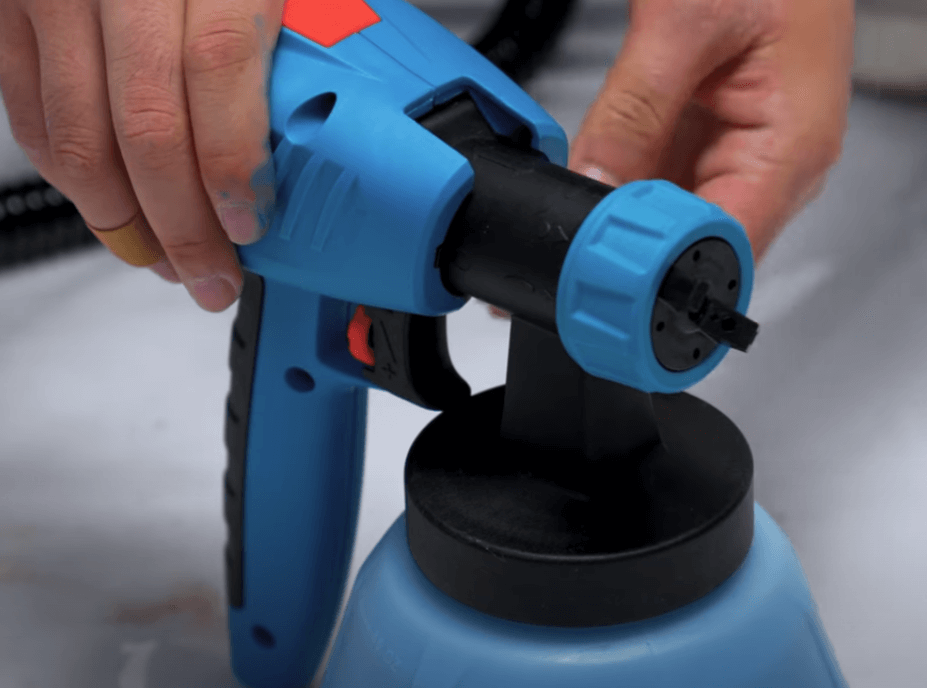
The Tilswall 800W paint sprayer has a knob and nozzle that changes the spray style and the paint flow. The knob controls the paint flow, while the nozzle changes the spraying pattern. Rotating the knob left or right may change the flow of paint. However, the gun’s nozzle changes the gun’s spraying pattern. You can select the pattern according to your own choice.
Painting with The Paint Sprayer
Painting is a delicate process that requires precision. The residue and drips from the spray are more than enough to ruin the looks of your home interior. For this purpose, you can use plastic or newspaper effectively to cover your precious objects to keep a safety check.
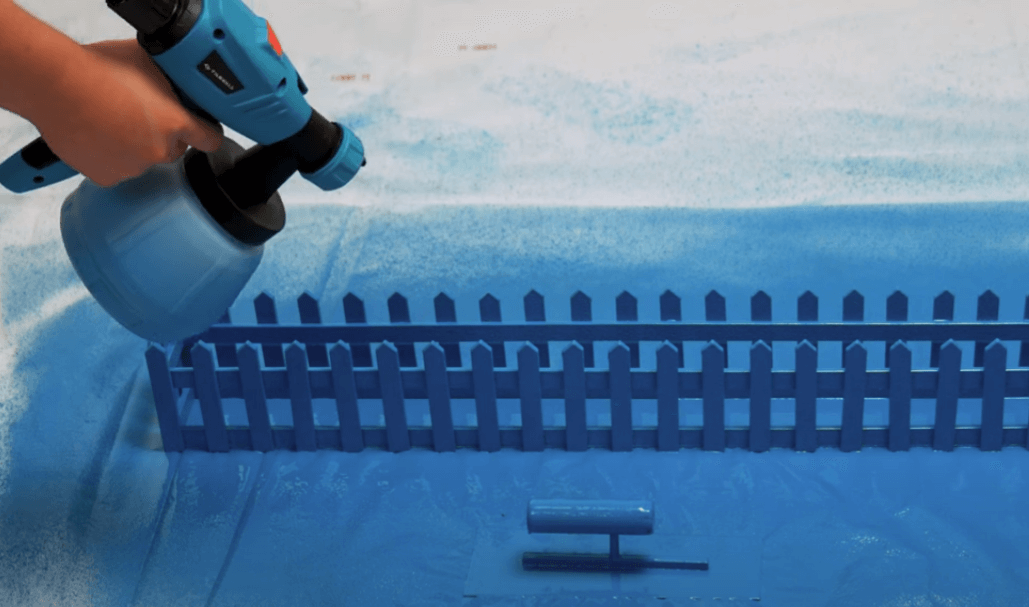
To start the painting with a Tilswall 800W paint sprayer, you must first detach the paint bucket with a spray gun. Only fill the bucket if it results in clogging and spilling of paint. To analyze the performance, you may paint in an S curve to check the color results on the fence or door.
Step-by-Step Process
Those who are interested in following DIY tips may follow my painting pattern. I have followed the instructions and never did experiments while using an electric spray gun, from detaching the gun to applying it to the objects. Here are three crucial steps to using Tilswall 800w paint sprayer that I did:
- Paint from top to bottom by equally dividing the sections
- Use the S-style painting method to keep applying the paint without stopping
- Follow safety precautions while painting
How to Clean and Maintain it?
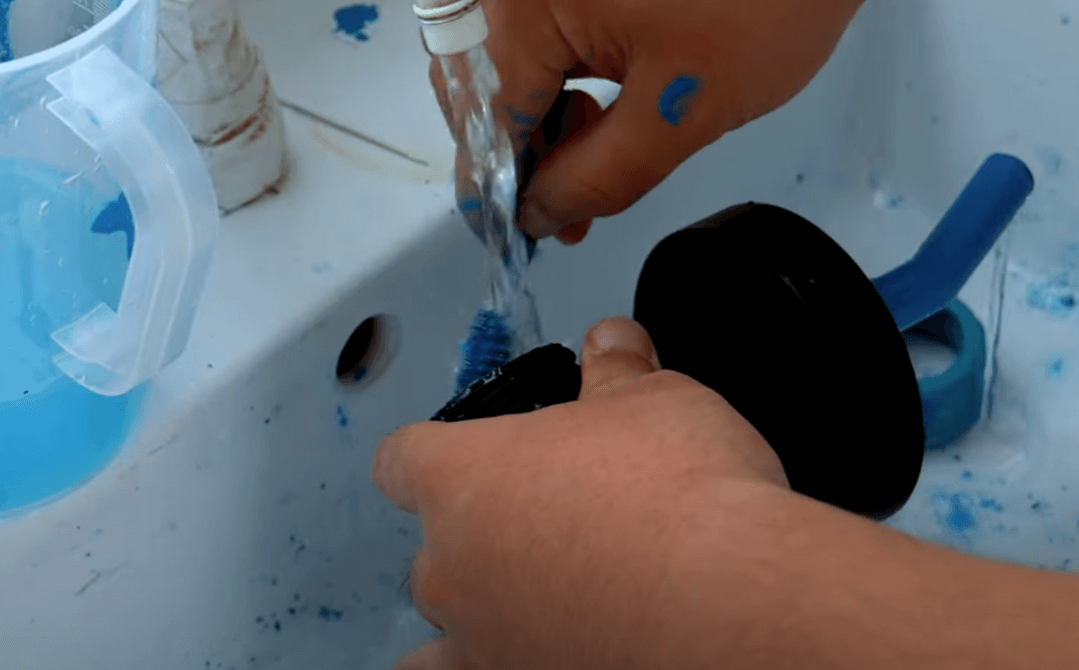
Clean and maintain the Tilswall 800W paint sprayer for great coverage and smooth effect to boost performance within 15 minutes to avoid clogging. Here are three steps to clean and maintain the paint sprayer:
- Open the spray container and drop off the remaining paint you haven’t used.
- Bring the nozzle and tubes to clean the spray container, or use a brush fully dipped in the diluent to remove leftover material.
- Fill the spray container with water and continue spraying until the paint color disappears to confirm the cleaning process. This is the last step to maintaining your Tiswall paint spray gun.
I have experienced this at home, so take advantage of this critical step.
Benefits of Split Spray Gun Design
Maintaining and cleaning are crucial, but you can’t ignore the benefits of a split spray gun for managing paint activities. Whether it comes to the usage or design of a split spray gun, it offers enormous benefits.
Here are some usage benefits:
- It offers excellent versatility and doesn’t look like a traditional paintbrush job
- It enhances speed, and you end up with the paint job in less time
- It provides excellent control while painting that you don’t enjoy with a traditional process
Here are some design benefits of an electric spray gun:
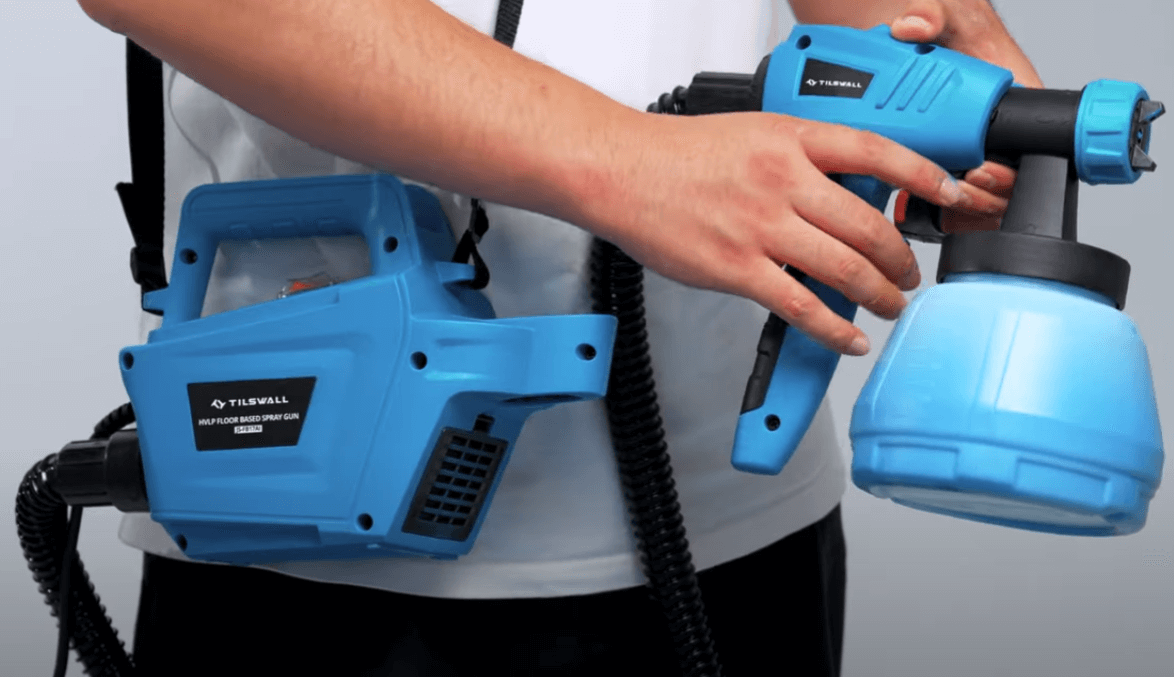
- A split spray gun comes with a strap that allows a user to hang it on the body rather than carrying it on the arm.
- You can fit the spray head in the jack on the main body of the gun at your ease to save energy.
- It can accelerate your paint work, and you don’t get tired.
Conclusion
The TILSWALL 800W Paint Sprayer is a remarkable paint sprayer tool that has made my work simple and enjoyable. With its power and ease of use, you don’t need to call professionals at your place to begin the painting job. I recommend that you buy it and try it. It’s time to try to experience this helpful paint gun that saves valuable time and money. This product deserves more than five stars!